
QteQ T plate for MiniZ MR03 102mm
- Price: 17,45 Eur VAT included
- SKU: 4580299722778
- Reference: QT-101102-RD
- Category: MiniZ MR03 Rear Axle
- Weight: 20 gr
- Dimensions: 0 x 0 x 0 cm
- Availability: Last units
Description:
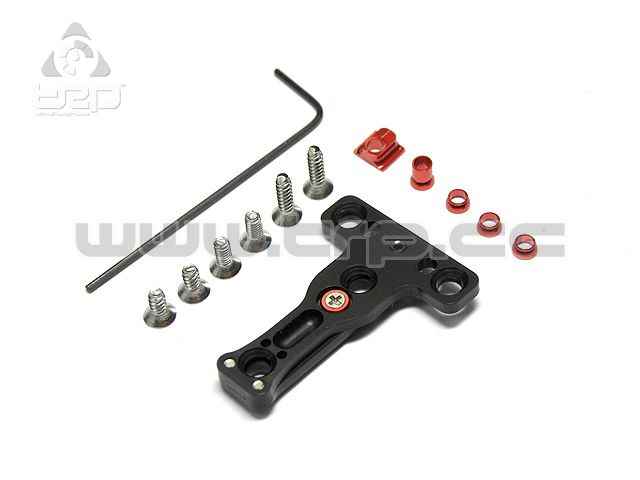
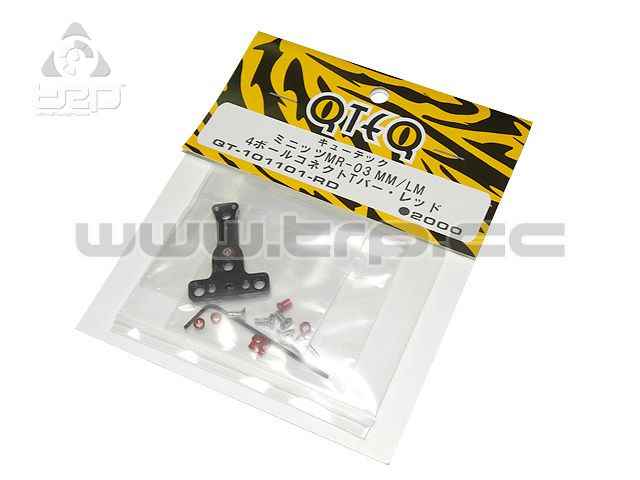
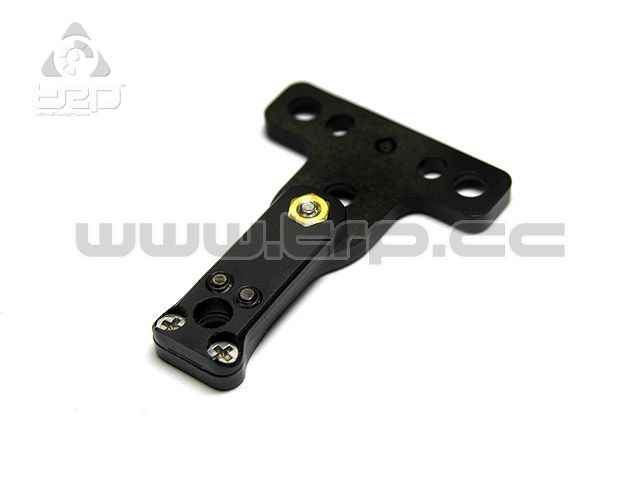
QteQ T plate for MiniZ MR03 98mm.
Is a special T bar named 4 balls connect T-Bar set.
Colour Gold.
Manual:
QTEQ QT-10110198 and QT-101101102 4 Ball Connect T-bar Set Guide
“4 Ball Connect T-bar Set (4BTB)” is intended to use together with either a top oil or
friction shock. As the installation and adjustments require delicate work, please read
these instructions thoroughly before beginning assembly on the 4BTB.
#0 and #1 Phillips screwdrivers are needed to install and adjust “4 Ball Connect T-bar
Set”. Tweezers or pliers may help ease the installation and adjustments. 4BTB
enables users to easily change tweak and roll rigidity of the rear suspension without
having to remove it from the chassis. However, please be mindful that adjustments
must be made in small increments. If you fail to do this, this may lead you into falling
into a pit trap of chassis setting. Please make adjustments one-at-a-time and re-check
the adjustment results each time by running the car on the track, paying special
attention to the effect of the adjustment of 4BTB did on the handling characteristic.
Before changing anything, please drive the car with the stock settings provided on the
4BTB and adjust from here, again in small increments. If chatter occurs at the time of
braking or reversing the car, it would be recommendable to change the damper setting
or limit the rebound stroke of spring unit. When used appropriately, in combination
with a top damper and damper system the 4BTB can support more finely tuned chassis
settings, which expert drivers crave and pursue.
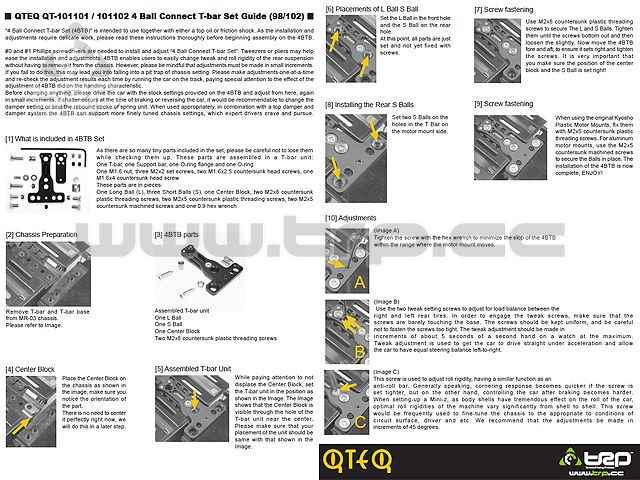
[1] What is included in 4BTB Set
As there are so many tiny parts included in the set, please be careful not to lose them
while checking them up.
These parts are assembled in a T-bar unit:
One T-bar, one Support bar, one O-ring flange and one O-ring
One M1.6 nut, three M2x2 set screws, two M1.6x2.5 countersunk head screws, one
M1.6x4 countersunk head screw
These parts are in pieces:
One Long Ball (L), three Short Balls (S), one Center Block, two M2x8 countersunk
plastic threading screws, two M2x5 countersunk plastic threading screws, two M2x5
countersunk machined screws and one 0.9 hex wrench
[2] Chassis Preparation
Remove T-bar and T-bar base from MR-03 chassis.
Please refer to Image.
[3] 4BTB parts
Assembled T-bar unit
One L Ball
One S Ball
One Center Block
Two M2x8 countersunk plastic threading screws
[4] Center Block
Place the Center Block on the chassis as shown in the image, make sure you notice the
orientation of the part.
There is no need to center it perfectly right now, we will do this in a later step.
[5] Assembled T-bar Unit
While paying attention to not displace the Center Block, set the T-bar unit in the
position as shown in the Image. The Image shows that the Center Block is visible
through the hole of the T-bar unit near the center. Please make sure that your
placement of the unit should be same with that shown in the Image.
[6] Placements of L Ball S Ball
Set the L Ball in the front hole and the S Ball on the rear hole.
At this point, all parts are just set and not yet fixed with screws.
[7] Screw fastening
Use M2x8 countersunk plastic threading screws to secure The L and S Balls. Tighten
them until the screws bottom out and then loosen the slightly. Now move the 4BTB
fore and aft, to ensure it sets right and tighten the screws. It is very important that
you make sure the position of the center block and the S Ball is set right!
[8] Installing the Rear S Balls
Set two S Balls on the holes in the T Bar on the motor mount side.
[9] Screw fastening
When using the original Kyosho Plastic Motor Mounts, fix them with M2x5
countersunk plastic threading screws. For aluminum motor mounts, use the M2x5
countersunk machined screws to secure the Balls in place.
The installation of the 4BTB is now complete, ENJOY!
[10] Adjustments
(Image A) Tighten the screw with the hex wrench to minimize the slop of the 4BTB
within the range where the motor mount moves.
(Image B) Use the two tweak setting screws to adjust for load balance between the
right and left rear tires. In order to engage the tweak screws, make sure that the
screws are barely touching the base. The screws should be kept uniform, and be careful
not to fasten the screws too tight. The tweak adjustment should be made in
increments of about 5 seconds of a second hand on a watch at the maximum.
Tweak adjustment is used to get the car to drive straight under acceleration and allow
the car to have equal steering balance left-to-right.
(Image C) This screw is used to adjust roll rigidity, having a similar function as an
anti-roll bar. Generally speaking, cornering response becomes quicker if the screw is
set tighter, but on the other hand, controlling the car after braking becomes harder.
When setting-up a Mini-z, as body shells have tremendous effect on the roll of the car,
optimal roll rigidities of the machine vary significantly from shell to shell. This screw
would be frequently used to fine-tune the chassis to the appropriate to conditions of
circuit surface, driver and etc. We recommend that the adjustments be made in
increments of 45 degrees.
- Price: 17,45 Eur
- SKU: 4580299722778
- Reference: QT-101102-RD
- Category: MiniZ MR03 Rear Axle
- Weight: 20 gr
- Dimensions: 0 x 0 x 0 cm
- Availability: Last units
There are no downloadable documents for this item.